Language:


Description:
The working principle of the ultrasonic parking space detector is to use ultrasonic launch. It is a non -contact measuring instrument through the reflection of the measured object and the time difference after the return of the echo is received.
Interface description
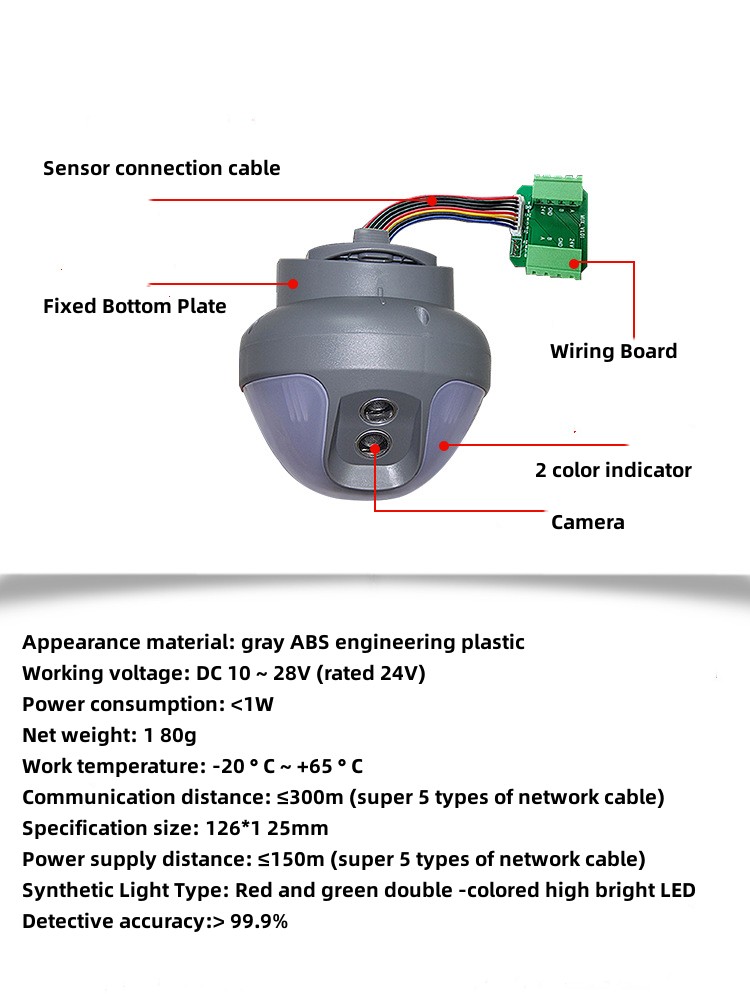
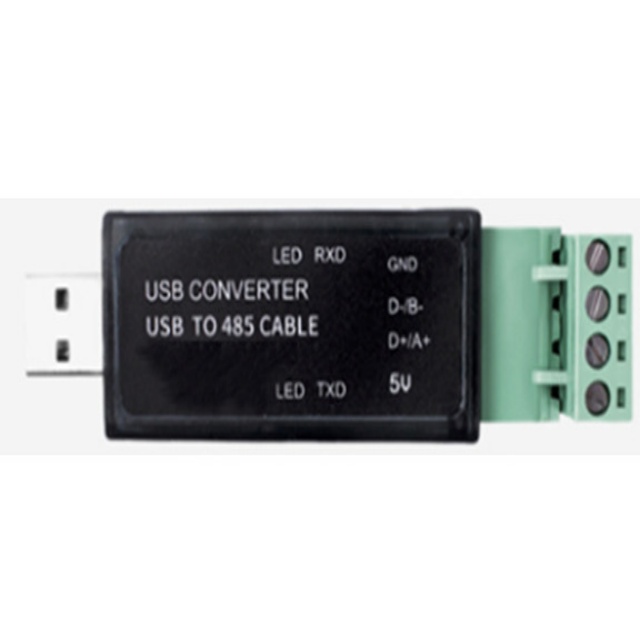
1.Power and communication bus interface:
| Power Interface | RS485 Interface | ||
| V+ | V- | A | B |
| +12V | GND | 485A | 485B |
2. External LED light interface:
| +5V | GND | RED | GREEN |
| Wiring to led +5v | Wiring to led gnd | Wiring to led red light | Wiring to led green light |
Feature
Primary characteristic
*Industrial -level design, adapt to various harsh environments,
*Vehicles used in garage parking spaces have real -time inspection,.
*Use RS485 communication bus,
Ultrasonic detector working status and indicator light status
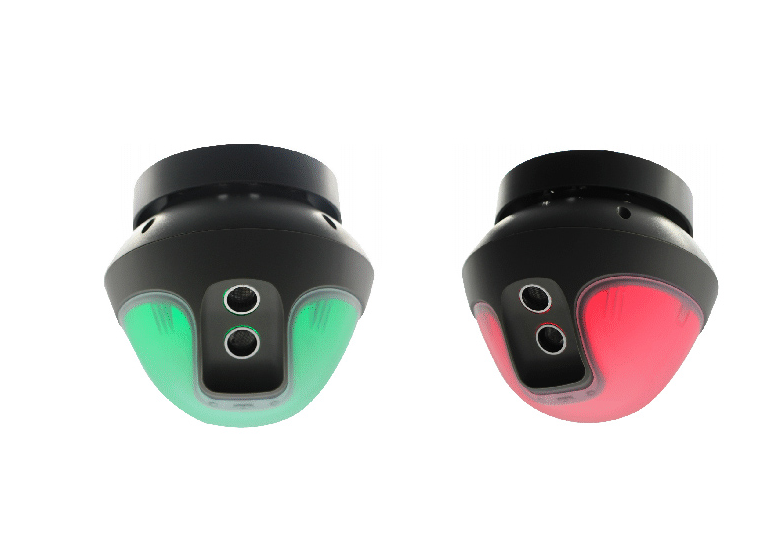
A. After powering, the power indicator (Power/Red) is on,
1. When the ultrasonic sending or receiving of the detector is not normal, the status light
(State/green) Flash 15 times a second,
2. When the ultrasonic sending and receiving of the detector are normal, but there is no car, pass
Normally, the status light (State/green) flashes 3 times a second,
3. When the ultrasonic sending and receiving of the detector are normal, but there is no car, no
During the communication, the status light (State/green) flashes once in one second,
4. When the ultrasonic sending and receiving of the detector are normal, and there are cars,
Status light (state/green) has been on,
B. Flexible setting alarm distance (measured 0.3- -4.00 meters) see the jump line setting table. When the vehicle is in place and the determination distance is less than the preset distance, the red LED light is on outside, otherwise the green LED light is turned on.
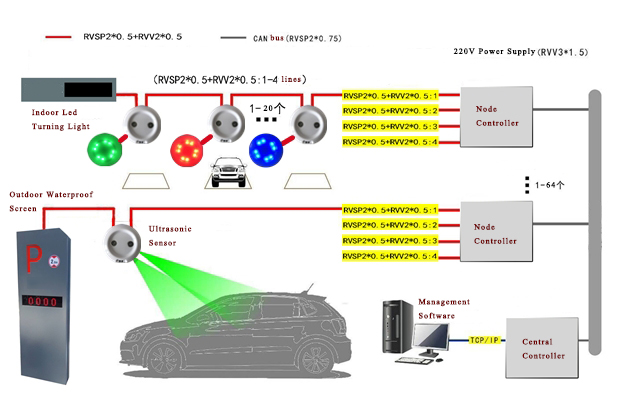
System Diagram
*The measurement distance of the measurement is not exposed to the measured object, no activity parts, simple installation, debugging, convenient maintenance and maintenance, high measurement accuracy, and can output 9600bit serial data signals to connect with PC computers.
*The 485 standard serial port can transmit more than 1000 meters, which is conducive to the remote transmission and CHU processing of data.
*During the installation and debugging, the surface of the ultrasonic probe is strictly prohibited to touch by hand or other objects
Touch to avoid signal lag and damage.
*After the installation is installed, the 24V power supply is connected. During the ranging, the distance between the ranging and the measured object should be the fixed value. As much as possible to the measured object, to ensure the accuracy of the measured distance reading.
Applications:
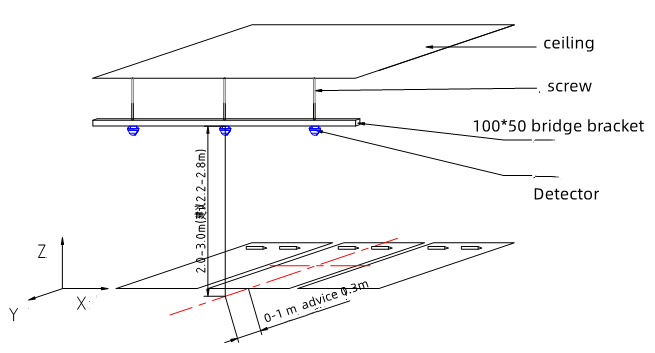
Installation of front-mounted intergrated ultrasonic detectors
The front-mounted intergrated ultrasonic detector is installed above the parking space line, and the horizontal distance from the parking space line is 0 to 1 meter, and 0.3 to 0.5 meters is recommended; the installation height is between 2 and 3 meters, and the recommended installation height is 2.5 meters.
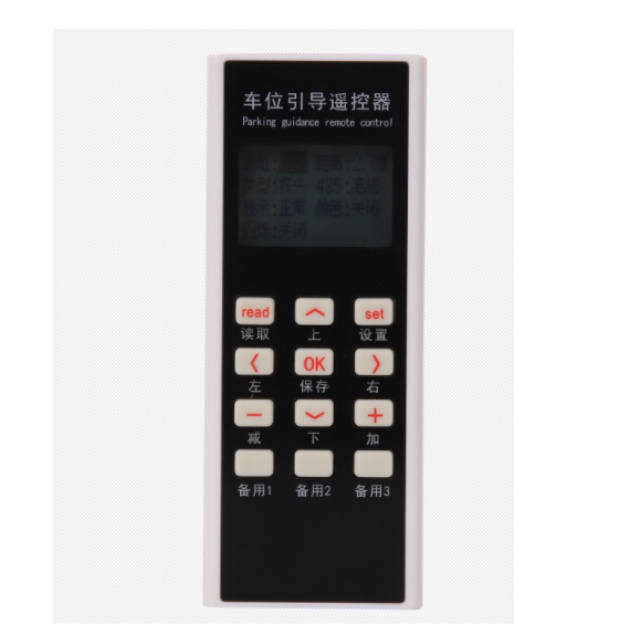
Remote Control Setting
Set the remote controller as an alternative to a DIP switch to remotely set the probe distance. The traditional DIP switch needs to go up and down the ladder to debug the probe when debugging, and the remote control remote setting only needs to hold the remote control under the probe to set.
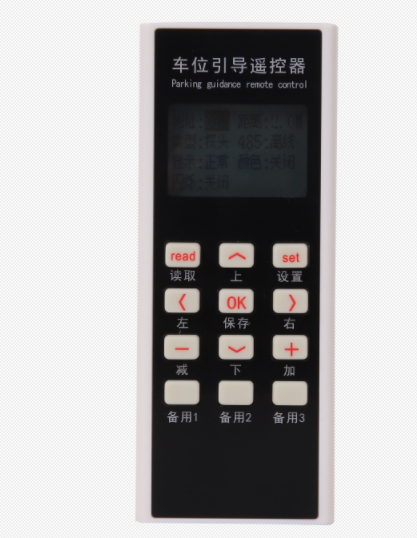
Instructions:
1. The initialization is completed in about 1 second after power-on, and the above data is displayed on the screen.
2. Press the read key to read the current device value (this step can be skipped)
3. Use up, down, left and right to select the parameter to be modified, and press plus or minus to modify it to the desired value
4. After modification, press the Set key to complete the modification. If the device receives the modification information and the modification is successful, it will flash blue once.
We are original manufacturing factory in china
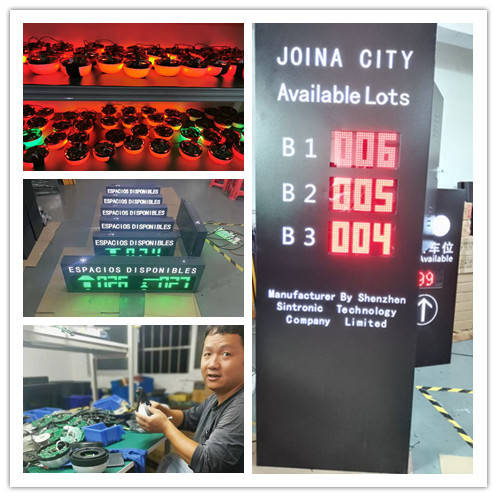
Contact: Tim Wu
Phone: +86 15813805304(whatSapp)
Tel: +86-15813805304(WeChat)
Email: infors@sintronictech.com
Add: No.3368,Pengrunda Commercial Plaza 32101,Rd Houhaibing,Haizhu District,Yuehai Street,NanShan Area,Shenzhen City,China


 Chat On WhatSapp
 Feedback